Wednesday 28 March 2012

Quit Multitask apps on iPad


  • double click the "Home" button to bring up the task manager (in the bottom of the screen)
  • Tap and hold your finger on the app icons until you see something like this...


  • Click the red icon in the left corner of the app you would like to close

Import/Export GarageBand project (iPad)

You need:


Here are the steps:

  • Connect your iPad
  • Start DiskAid
  • Go to menu DiskAid, Preferences, Advanced tab, check "Show root path for Apps" (this step will need to do only once)


  • Go to Apps, GarageBand
  • Open the folder path GarageBand, Library, Application Support, Documents


Importing song:

  • Drap and drop the project folder (<name>.band) to the right panel
  • You will need to restart GarageBand to see the new song.


Exporting song:

  • Drap and drop the song folder in the right panel to you computer.


Import GargageBand project into iPad

I assume you have the GarageBand <name>.band folder on your computer.

You need the following software:


Connect your iPad to your computer

  • Start DiskAid
  • On the left side, Click on the Apps\GarageBand
  • Drop and drop the <name>.band folder into the right panel


Open this project in GarageBand for iPad:

  • Start Garageband
  • Go to My Songs page
  • Click the "+" sing to add a new song
  • Click "iTunes" (under Copy from") and select the song you just copied

You should delete the folder in DiskAid to save some space.

Monday 26 March 2012

Free comics book reader

ARCreader for iPad

ARCreader is a free utility to let you read PDF, CBR, CBZ, ZIP and RAR archives on your iPad! Perfect for reading PDFs or any of your personal comic books or ebooks in those supported formats.

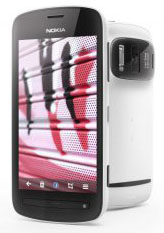
Nokia 808 PureView


700-nokia-808-pureview-white-pair

Nokia's 808 PureView smart phone, with a 41-Mp sensor, produces 5-Mb images

  • the innovation and news is not the number of pixels but rather how those pixels are used (as 3x zoom and great low light performance)
  • use a sensor with somewhat higher resolution than needed at the time but output a lower resolution image than the sensor input resolution, possibly adding some upscaling/interpolation to provide a meaningful enough zoom range


LMMS

LMMS is a free cross-platform alternative to commercial programs like FL Studio®, which allow you to produce music with your computer. This includes the creation of melodies and beats, the synthesis and mixing of sounds, and arranging of samples. You can have fun with your MIDI-keyboard and much more; all in a user-friendly and modern interface.

download here...


Features

  • Song-Editor for composing songs
  • A Beat+Bassline-Editor for creating beats and basslines
  • An easy-to-use Piano-Roll for editing patterns and melodies
  • An FX mixer with 64 FX channels and arbitrary number of effects allow unlimited mixing possibilities
  • Many powerful instrument and effect-plugins out of the box
  • Full user-defined track-based automation and computer-controlled automation sources
  • Compatible with many standards such as SoundFont2, VST(i), LADSPA, GUS Patches, and MIDI
  • Import of MIDI and FLP (Fruityloops® Project) files

Sunday 25 March 2012

Image Mask and Paint Stroke in Motion


Create an Image mask and Convert the Animated Brush Stroke to a Mask:
  • Right click the object you'd like masked (in the Layers tab)
  • Select "Add Image Mask" from the contextual menu
  • Drag the animated stroke (e.g. Liquid, Ink Bleed 01 Heavy) onto the Image Mask layer (in the Layers tab)

Painting with Motion

Select Paint Stroke Tool
Open the HUD to review the paint stroke options

  • the "Write On" option will add animation to the static stroke
  • Change the Width to 50 pixels

Open the Shape tab in the Inspector window

  • Select a new shape style: some styles are static (show the whole stroke at once) and some are animated (e.g. Ink Bleed 01 Heavy, Ink Bleed 02 Taper, Ink Bleed 03 Drops, Ink Dilate 01, 02, 03, 06, Light Streak, Light Tail, Ants, Chocolate, Smoke 01, Splatter 01, Wood Shavings 01, 02, )
  • Change the brush color
  • Change the brush opacity to show more dimensional


Friday 23 March 2012

Lightroom partially B/W

Use Adjustment Brush to paint the part that you would like to be B/W with Saturation = -100, set Auto Mask on (to help paint at the edges)

Lightroom Adjustment Brush

The Adjustment Brush is an awesome tool that you can use to make local edits (vs global changes) to photo qualities including exposure, brightness, saturation, contrast, and others, like Soften Skin and Teeth Whitening.
  • Press "K" to turn on or off the Adjustment Brush
  • Reset all the settings first (the last setting will be shown)
  • There are two circles with the brush, the inner circle will be fully affected (the size) and the outer circle is the feather.
  • Check "Auto Mask"... Auto masking attempts to sense the edges of whatever it is in your photo that you’re painting in order to help you paint only inside your intended area.  You can turn on and off the Auto Mask, just hold the <Control> key as you paint
  • Use the [ and ] key to decrease and increase the Size of the brush tip
  • In the Brush area you will see two brushes, A and B. You can switch between the two by clicking on the A or B indicator. Each brush has its own Size, Feather, Flow and Density settings, and AutoMask can be enabled for either or both of the brushes. Having two brushes lets you configure each differently and switch easily between the two.
  • Each brush (A or B) can be switched into the third brush mode – Erase mode (to erase the brush strokes) by holding the Alt key (Option on the Mac) as you paint with either brush.
  • Press "O" to reveal / hide an overlay that shows where the brush strokes have been applied.  <Shift> to change to another color to show the overlay (it helps when the overlay color conflicts with the image)
  • Flow is the percentage applied for each brush
  • Press "H" to show / hide a pin (where you have initiated brushes).  The active pin is denoted by a black center.  Move the mouse over the pin will show the overlay of the brush.  If there are more than one pin, select on the pin to select it as the active one.
  • Press "Reset" to clear all the brushes
  • Press "Delete" to clear the active brush
  • In the Effect area is a Color option which allows you to paint over an image with a color of your choice. To do this, select the color to use and then paint over the area to apply it to. You can use this to colorize a black and white image or, paint over a dark blue area with yellow to make it dark green.


MuseScore - SoundFonts

MuseScore comes with a special type of file called a SoundFont that tells MuseScore how to play each instrument sound.

To change the SoundFont in MuseScore:
Go to DisplaySynthesizer  and select the new SoundFont.


MuseScore - Free Music Notation Software

http://musescore.org

Has a winPenPack version (i.e. no need to install) here... but it is not the latest version yet.

Quite easy to use and can use mouse, keyboard to enter the notes.

  • Use number keys for the duration of the note
  • Use corresponding letters for the pitches (with the <shift> key to enter chord note)

   C D Shift+F Shift+A E F
  • <Ctrl> Up and Down to increase and decrease the pitch by octave
  • (Up): Increase the pitch of a note by a semitone (uses sharps).
  • (Down): Decrease the pitch of a note by a semitone (uses flats).
  • R: Duplicate the last entered note
  • Q: Halve the duration of the last entered note
  • W: Double the duration of the last entered note
  • Backspace: Undo last entered note
  • X: Flip direction of note stem
  • Shift+X: Move note head to opposite side of stem

For using the MIDI keyboard, make sure to connect and turn on the keyboard first before starting the software.

More info on note entry


Sibelius Notes Size

Document Setup (Layout, Document Setup) or (Control/Command+D) and increase the staff size.

Wednesday 21 March 2012

Google SketchUp

"3D modeling for everyone"...

Home page and download

Download the training videos.

Download and Install Google Earth Plugin

Lenovo LT1421 14" LCD monitor


  • 14' 1366 x 768
  • contrast ratio 400:1
  • Response time 8ms
  • USB connection
  • USB powered
  • 1.8lbs (2.25 lbs with screen cover)

10% eCoupon: LENOVOTECHIES (until Mar 31, 2012)
 more info...

Thursday 15 March 2012

Multiple Main Methods in C#

Specify the Startup object in the Project Properties, Application tab.


Make sure the Main() method takes no parameters, or a single array of string ("string", not "String").  It should also returns nothing, or an int.  Otherwise, the main method(s) won't be shown in the dropdown list.


        static void Main(string[] args)
        {
 
        }

        static void Main()
        {
 
        }

Wednesday 14 March 2012

Western Digital

Western Digital is the world's largest hard drive maker now.

There are now only three major manufacturers of traditional PC hard drives in the world:

  • Western Digital (acquired Hitachi Global Storage)
  • Seagate (acquired Samsung's hard drive division) and
  • Toshiba


Tuesday 13 March 2012

CDN (Content Delivery Network)

It is a system of computers with scripts and other content on them that are widely used by many web pages.  The content will often be cached (like the link to jQuery) at a network node, therefore, it will speed up the web pages.


Mac OS X Lion with NTFS read-write support

NTFS Volumes: Okay with big files an bug volumes. Works natively in all Windows systems. Works fluently in all Linux systems. Has native read-only support in Mac OS X. But has not write support under Mac OS X.

Download and install the following software:


restart the computer
ignore the following warning:


more info...

Monday 12 March 2012

LINQ to Objects

LINQ to Collections...

"The term 'LINQ to Objects' refers to the use of LINQ queries with any IEnumerable or IEnumerable(Of T) collection directly, without the use of an intermediate LINQ provider or API."


Calling...

Never try to teach a pig to sing.  It is a waste of your time and it annoys the pig.

Sunday 11 March 2012

VMware Fusion Expanding Hard Disk

Make sure you have enough disk space on the disk... it will need extra disk space when expanding the virtual disk.

To expand a virtual, go to the setting of the virtual machine, select the HD, and select the disk you would like to expand.  Take in the new size and click "Apply".

You will need to expand the partition as well (in the virtual machine).

Windows cannot connect to MacbookPro

It had been working but suddenly when I tried to connect by the IP address, a login screen came up.  Even though I entered the correct user name and password, I couldn't connect to the Mac computer.

Try either or both steps:

  • Go to the Sharing on my MacbookPro, click "Options...", deselect the user account (and provide the password) then select the user account again (enter the password one more time).  
  • Go to the Sharing on my MacbookPro, click "Options...",  disable the sharing (uncheck "Share files and folders using SMB", click "Done") and then enable it again.

Saturday 10 March 2012

Windows Ultimate N Windows Media

The Media Feature Pack for Windows 7 N or Windows 7 KN will install Media Player and related technologies on a computer running Windows 7 N or Windows 7 KN editions, or these editions with Service Pack 1. For further information, please see http://support.microsoft.com and query the Knowledge Base for the article number KB968211.

The reason I need to install the Windows Media back is Adobe Premiere Pro and Photoshop are looking for the DLL.

Wednesday 7 March 2012

Change Tempo in GarageBand


  • Drag and Drop the file into GarageBand
  • Select the track and press <Control><Option>G
  • Deselect the track
  • Double click the track again and in the Song Editor, check "Follow Tempo & Pitch" under Pitch
  • Change the Tempo


Windows 8 Consumer Preview

Installed in VirtualBox with the ISO image.
  • product key: DNJXJ-7XBW8-2378T-X22TX-BKG7J
  • Won't able to start and need to retry a few times...
  • Restart is not working, it will lock up the computer.  When it happens, reset the computer and it will repair the OS.  No, it doesn't work.  Close the VM and start again.


Need to shutdown the PC after a auto reboot to continue the setup process.
  • Update: Apr 3, 2012 - with VirtualBox 4.1.12, the installation is smooth.

  • Don't install "VirtualBox Guest Additions"
  • Having un-repairable problem after using it for a couple of times


Monday 5 March 2012

Removing VSS files from a solution

Remove the Read-only Attribute of the files

Remove the mssccprj.scc, vssver.scc <solution>.vspsscc and <solution>.suo files in the solution folder
Remove the mssccprj.scc, vssver.scc and <project>.csproj.vspscc files in the project folder

Remove the GlobalSection(SourceCodeControl) in the solution (<solution>.sln) file

Remove the following lines from the vb project file (<project>.vbproj/<project>.csproj):
  • SccProjectName = "SAK"
  • SccLocalPath = "SAK"
  • SccAuxPath = "SAK"
  • SccProvider = "SAK"
or
  • <SccProjectName>SAK</SccProjectName>
  • <SccLocalPath>SAK</SccLocalPath>
  • <SccAuxPath>SAK</SccAuxPath>
  • <SccProvider>SAK</SccProvider>

Remove vssver.scc in all folders


FCP X 10.0.3

Apple has 

  • added the Multicam feature
  • improved chroma keying
  • the ability to connect to broadcast monitors and
  • better import and export options
Free Trial for 30 days

Thursday 1 March 2012

DRY

Don't Repeat Yourself

Entity Framework and Database


By default, when you use Entity Framework Code First to automatically create a database, as you did earlier in this tutorial, Code First adds a table to the database to help track whether the schema of the database is in sync with the model classes it was generated from. If they aren't in sync, the Entity Framework throws an error. This makes it easier to track down issues at development time that you might otherwise only find (by obscure errors) at run time. The sync-checking feature is what causes the error message to be displayed that you just saw.

There are two approaches to resolving the error:
  1. Have the Entity Framework automatically drop and re-create the database based on the new model class schema. This approach is very convenient when doing active development on a test database, because it allows you to quickly evolve the model and database schema together. The downside, though, is that you lose existing data in the database — so you don't want to use this approach on a production database!
  2. Explicitly modify the schema of the existing database so that it matches the model classes. The advantage of this approach is that you keep your data. You can make this change either manually or by creating a database change script. 

Great team players

They are reliable, dependable, proactive, diligent, great leaders and great followers... they possess a wide range of easily-defined—but hard to find—qualities.